 IGUANIFY
How to Schedule TikTok Posts for Maximum Reach

Scheduling TikTok posts is the process of setting your videos to publish automatically at a chosen date and time, using either TikTok’s built-in scheduler or a third-party tool. Creators who schedule posts consistently reach their audience during peak activity windows without having to be online at those exact moments. TikTok’s native scheduler is free and works for Creator and Business accounts, but it comes with real constraints. Third-party tools fill those gaps with longer scheduling horizons, mobile support, and cross-platform posting. This guide covers both paths, plus the timing data you need to get the most out of every post.
What do you need to schedule TikTok posts?
TikTok’s native scheduler is desktop-only, available through the TikTok website or TikTok Studio. Personal accounts cannot use it. You need a Creator or Business account to access the scheduling option at all. That requirement alone filters out a large portion of casual users who have not yet made the switch.
The native scheduler caps your planning window at 10 days in advance. That works for most weekly content calendars, but it rules out campaigns planned a month out. You also cannot schedule videos that were drafted in the TikTok mobile app, and any trending sounds added inside the app will not carry over to a scheduled post.
Third-party scheduling tools solve most of those problems. They connect to TikTok through the official Content Posting API, which means posts go live automatically without any manual confirmation step. Pricing ranges from free tiers to $25 or more per month, depending on the platform and feature set.
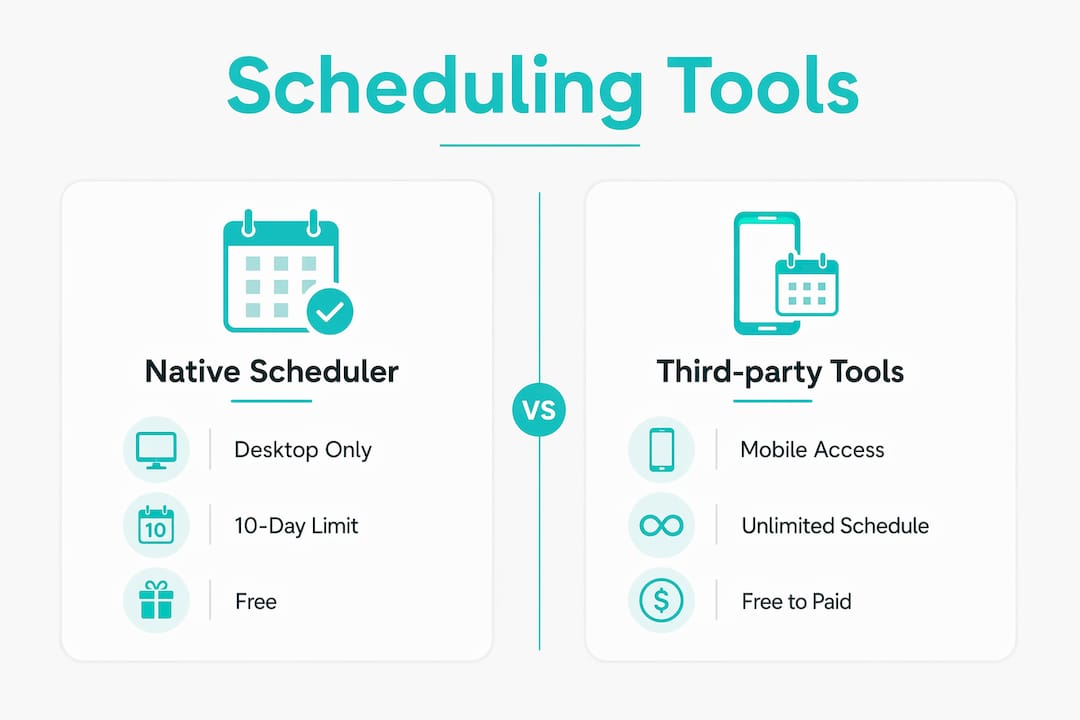
Here is a quick comparison of what each approach offers:
| Feature | Native TikTok scheduler | Third-party tools |
|---|---|---|
| Cost | Free | Free tier to $25+/month |
| Scheduling horizon | 10 days | Unlimited |
| Mobile scheduling | TikTok Studio app only | Most support mobile |
| Cross-platform posting | TikTok only | Instagram, YouTube, Facebook, and more |
| Post editing after scheduling | Not supported | Varies by tool |
| Multi-account management | Single account | Supported |
The right choice depends on your workflow. If you produce content on a desktop and post only to TikTok, the native scheduler costs nothing and gets the job done. If you manage multiple accounts or post across platforms, a third-party tool pays for itself quickly.
How to schedule TikTok posts using the native scheduler
The native scheduler is straightforward once you know where to find it. Follow these steps exactly, and you will avoid the most common pitfalls.
- Log in on desktop. Go to TikTok.com or open TikTok Studio on your desktop. Sign in with your Creator or Business account. The scheduling option does not appear on mobile TikTok.
- Upload your video. Click the upload button and select your video file from your computer. Add your caption, hashtags, cover image, and any settings like audience restrictions or duet permissions.
- Enable scheduling. Toggle the “Schedule” option instead of “Post.” A date and time picker will appear. Choose a time within the next 10 days.
- Confirm the queue. Click “Schedule” to lock in the post. The video will appear in your scheduled posts list, where you can view it but not edit it.
- Monitor before publish. Check your scheduled posts list regularly. If you spot an error in the caption or cover image, delete the post and reschedule it. No edits are possible after a post is scheduled, so catching mistakes early saves time.
Pro Tip: Draft your caption in a separate document before uploading. Copy and paste it in during the upload step. This prevents typos that would force you to delete and reschedule the entire post.
One limitation worth knowing: if a trending sound becomes popular after you schedule your post, that audio will not update automatically. The sound you selected at upload time is the sound that goes live. Plan your audio choices with that in mind.
What can third-party scheduling tools do that TikTok cannot?
Third-party tools publish content beyond TikTok’s 10-day cap and handle cross-platform posting in one workflow. That matters if you are repurposing a TikTok clip as an Instagram Reel, a YouTube Short, and a Facebook video at the same time. Managing all of that from a single calendar saves real hours each week.
The general setup process works like this:
- Connect your account. Authorize the tool to access your TikTok Business or Creator account through TikTok’s official API. Never use tools that ask for your password directly.
- Upload your content. Add your video file, caption, hashtags, and cover image inside the scheduling tool’s interface.
- Set your schedule. Choose the date and time. Most tools display a content calendar so you can see gaps and avoid clustering posts too close together.
- Manage your queue. Review upcoming posts, reorder them, or pause the queue if your content strategy changes.
When picking a tool, match it to how you actually produce content. Mobile-based production pairs best with tools that have strong mobile apps and API integration. Desktop-first workflows fit well with the native TikTok scheduler or web-based third-party platforms. Friction in your production process leads to inconsistent posting, which hurts reach more than any timing mistake.
Pro Tip: Before committing to a paid plan, test the free tier for two weeks. Check whether the tool posts automatically or sends you a push notification to confirm. True API-based tools post without any action from you. Notification-based tools still require you to be available at post time.
Most established scheduling platforms offer free tiers that cover one or two accounts with limited monthly posts. That is enough to test the workflow before spending money. If you manage more than three accounts or post more than 30 times per month, a paid plan becomes necessary.
What is the best time to post on TikTok in 2026?
Peak global engagement on TikTok runs Tuesday through Thursday, 2:00 PM to 6:00 PM local time. That window reflects an analysis of billions of engagements and represents the period when most users are in a browsing mindset, often during afternoon breaks or commutes. Sunday is consistently the weakest day for new post performance.

Those numbers are a starting point, not a rule. Niche-specific timing often outperforms general data by a significant margin. Coaching and education accounts see their best engagement between 8:00 AM and 10:00 AM, when audiences are in a learning mindset. Food creators peak between 5:00 PM and 7:00 PM, when people are thinking about dinner. Posting at the “right” global time in the wrong niche window can still underperform.
Here is a practical timing reference by content category:
| Content category | Peak posting window | Notes |
|---|---|---|
| Education and coaching | 8:00 AM – 10:00 AM | Morning learning mindset |
| Entertainment and drama | 7:00 PM – 9:00 PM | Evening leisure browsing |
| Food and recipes | 5:00 PM – 7:00 PM | Pre-dinner decision window |
| Fitness and wellness | 6:00 AM – 8:00 AM | Pre-workout motivation |
| General / broad audience | 2:00 PM – 6:00 PM Tue–Thu | Afternoon engagement peak |
Use TikTok Analytics to check when your specific followers are most active. The “Follower Activity” tab shows hourly and daily breakdowns. That data overrides any general recommendation because it reflects your actual audience, not an average.
For posting frequency, beginners should aim for 1–2 posts per day. Established creators can push 3–5 posts daily, but spacing matters. Leave at least 3–4 hours between posts to avoid self-competition in the algorithm. TikTok’s algorithm treats each video independently, so more posts create more chances for distribution, but only if quality stays consistent.
Account-level throttling can reduce reach if you post more than roughly 10 clips in 24 hours. Spacing posts at least 90–120 minutes apart protects your distribution. Batch-scheduling a week of content is efficient. Dumping it all live in one afternoon is not.
Key Takeaways
A consistent TikTok posting schedule built around your audience’s actual active hours outperforms any generic timing formula.
| Point | Details |
|---|---|
| Account requirements | You need a Creator or Business account to use TikTok’s native scheduler. |
| Native scheduler limits | The built-in tool caps scheduling at 10 days and does not allow post edits after scheduling. |
| Third-party tool advantage | API-based tools post automatically, support multiple accounts, and schedule beyond 10 days. |
| Best posting times | Tuesday through Thursday, 2:00 PM to 6:00 PM local time, leads global engagement data. |
| Niche timing beats global data | Coaching peaks 8–10 AM; food peaks 5–7 PM. Use your own analytics to confirm. |
What I have learned from watching creators get scheduling wrong
Creators waste more time on scheduling than they realize, and most of the waste comes from one mistake: picking a tool that does not match how they actually work. I have seen creators who film everything on their phone sign up for desktop-only scheduling platforms, then abandon the habit within two weeks because the friction is too high. The best scheduling tool is the one you will actually use every day, not the one with the longest feature list.
The other pattern I see constantly is over-reliance on global timing data. Posting at 2:00 PM on a Tuesday sounds right until you check your analytics and realize your audience is most active at 9:00 PM on weekdays. Your own follower data is always more accurate than any industry benchmark. Treat published timing guides as a hypothesis to test, not a rule to follow.
The trending sound problem is real and underappreciated. If you schedule a post with a sound that was trending at upload time, that sound may be oversaturated or irrelevant by the time the post goes live. For entertainment content, especially serialized drama, this matters less because the story carries the viewer. For trend-dependent content, schedule closer to the publish date or leave trending audio for posts you publish manually.
Consistent posting beats perfect posting. A creator who posts five solid videos per week on a reliable schedule will outgrow one who posts 20 videos in a burst and then disappears for two weeks. The algorithm rewards cadence. Build a buffer of pre-produced content so you are never scrambling to fill a gap.
For creators producing episodic content at scale, the production bottleneck is usually the content itself, not the scheduling. Solve the production problem first, then scheduling becomes the easy part.
— Leonard
Iguanify makes the content side of your TikTok schedule easier
Scheduling is only half the equation. The other half is having enough quality content to fill that schedule consistently.
Iguanify produces fully realized video episodes from a single line of script, with consistent characters across every episode. That means you can batch-produce a week or a month of serialized TikTok content in one session, then feed it directly into your scheduling workflow. No editing team, no continuity headaches, and no scrambling for ideas. If you are building a faceless drama channel or producing short-form episodic content for TikTok and YouTube, Iguanify handles the production so you can focus on the schedule. You own the content and the IP. See how it works and decide if it fits your workflow.
FAQ
Can I schedule TikTok posts from my phone?
The TikTok app itself does not support scheduling, but the TikTok Studio app provides mobile scheduling access for Creator and Business accounts. Third-party tools with mobile apps also support scheduling TikTok videos directly from your phone.
What happens if I need to edit a scheduled TikTok post?
The native TikTok scheduler does not allow any edits after a post is scheduled. You must delete the scheduled post and reschedule it with the corrected content.
How far in advance can I schedule TikTok posts?
TikTok’s native scheduler allows scheduling up to 10 days in advance. Third-party tools that use TikTok’s Content Posting API have no fixed limit and can schedule posts weeks or months ahead.
Does scheduling TikTok posts hurt reach?
Scheduling itself does not reduce reach. Posting too many videos in a short window can trigger account-level throttling, so spacing posts at least 90–120 minutes apart protects your distribution.
What is the best time to post on TikTok for engagement?
Global data points to Tuesday through Thursday, 2:00 PM to 6:00 PM local time, as the strongest window. Niche-specific timing varies, so check your TikTok Analytics follower activity data to confirm the best hours for your specific audience.